Tutorial For Making This Unique Frozen Cake, Elsa Doll Cake
Frozen was RED HOT several years ago when the movie first came out. It isn’t the rage that it once was, but little girls still love the movie and still love Elsa. My 5 year old requested an Elsa cake for her birthday. I thought it would be fun to blend a Frozen cake with a princess-style cake my mom made for me waaaay back in the early 90’s. But with a twist- An Elsa doll cake needs to have the foot sticking out … right?
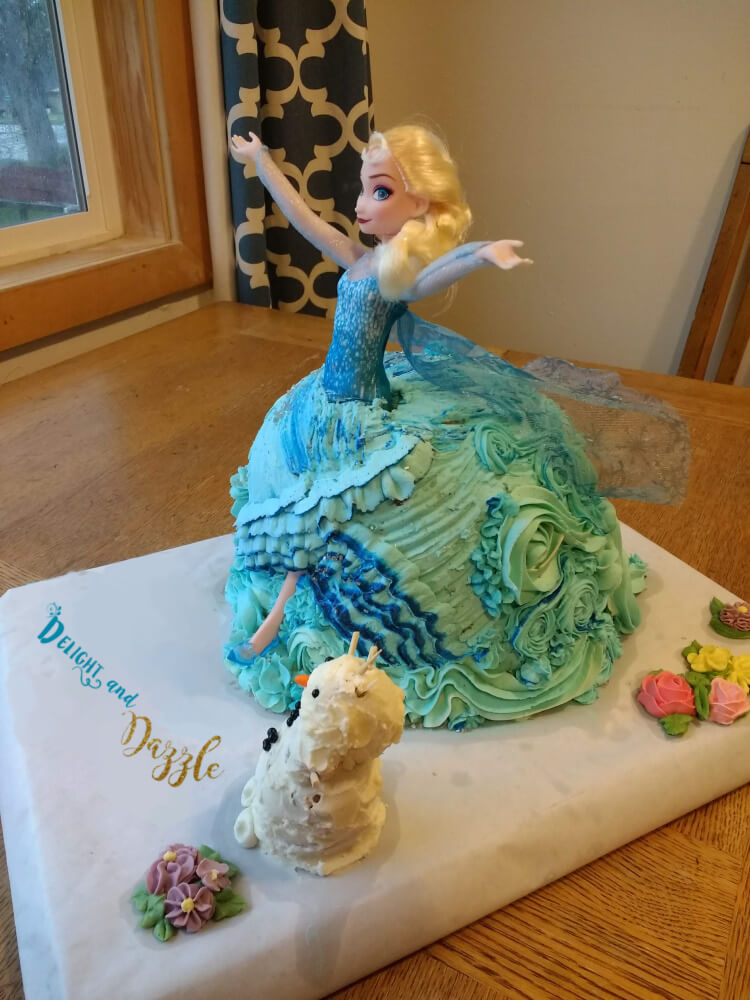
My attempt to adapt this Elsa doll cake with a foot sticking out wasn’t quite as easy as I had hoped, but it wasn’t too hard to pull off and I’ll show you how. You can certainly make it easier on yourself and make this cake without the leg sticking out.
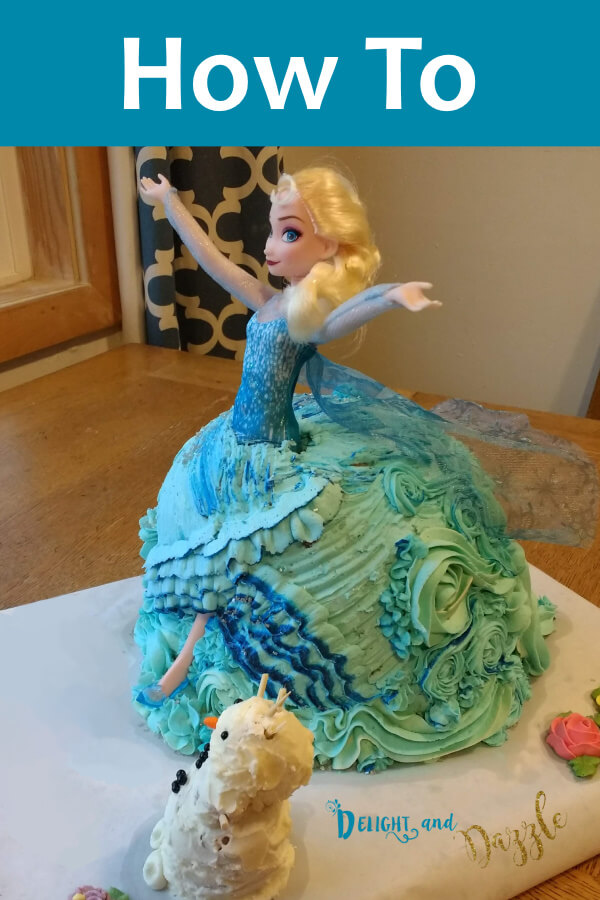
What makes this cake really unique is the artistic design of the icing. Elsa doesn’t have a flowy dress. She has a slim dress. But she has snow magic and her famous song is right in the middle of a snow storm. Imagine her dress flowing and swirling in the wind with flurries all around her! So the back of the cake is enveloped with snow flurries. A lot more fun this way! It’s quite easy to pull off with a few specific icing tips.
Starting With An Elsa For Frozen Cake
I bought the Elsa doll from Walmart and cut the slit in the dress myself. Later, after the cake was finished, I stitched it back up past the knee and gave it to my daughter as a fun keepsake from her party.
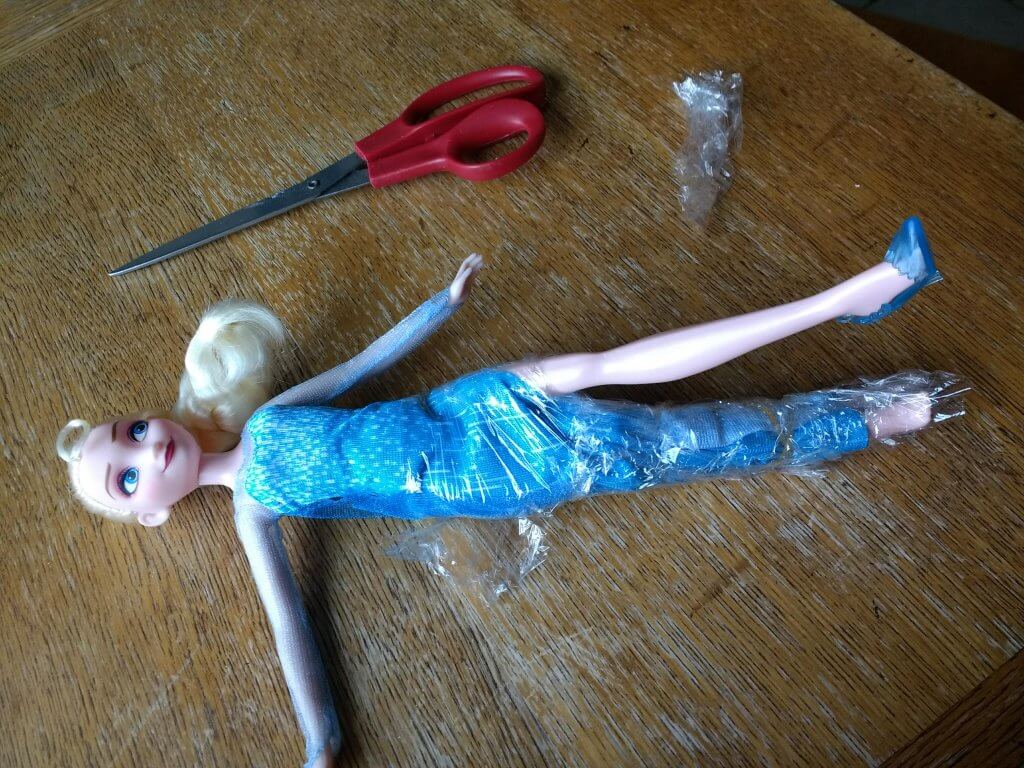
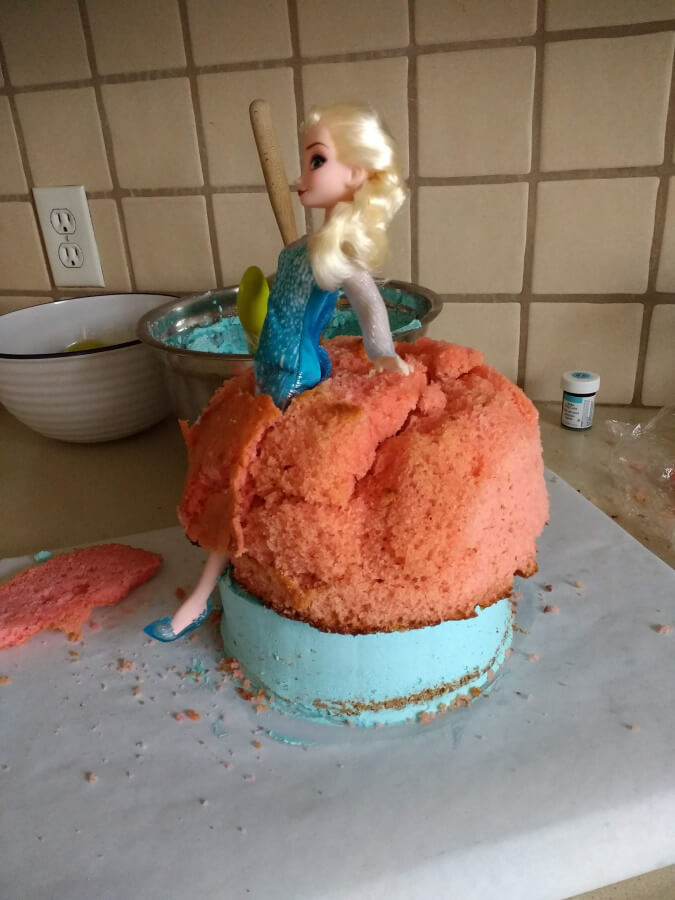
For making the Frozen cake, I cut the slit in the dress and wrapped her waist down (excluding the leg that would be sticking out of the cake) in saran wrap. You can see this in the picture. This was to keep the dress clean from cake and icing.
Baking the Elsa Doll Cake
This looks pretty messy but it really wasn’t.
I baked the cone cake in a large glass bowl that I had around in my kitchen. To help the cake bake through to the middle, I stuck a glass cup in the middle with water while it was in the oven baking. I don’t think that you need to fill it with water. (Someone here thought that if I didn’t fill it with water the glass would crack. But it has the batter around it so IDK!) I would try it without.
The water inside the glass cup made it take longer to bake in the middle so that’s why you see the top of the cake (the bottom in the picture) is dark and well done. The cake looks crumbly but it was moist, very dense, and very yummy.
Since the bowl was not tall enough for the Elsa doll cake, I baked a second round cake to go underneath. Since I realized this in advance I doubled the cake batter. Note that the cake won’t rise that much in a large glass bowl.
And it was okay that the second cake underneath wasn’t really the correct size. The difference wasn’t big and it didn’t matter. The icing piping covered it up. You can always add another thin cake underneath if you end up too short. And icing covers a multitude of mistakes!
Freeze that Frozen Cake
Then I froze the cakes before icing. This makes icing a cake much, much easier. I did what you may call a crumb layer. Freeze until the cake is really frozen first. Then, right out of the freezer, ice a thin layer over the cake. This will keep all those little crumbs in this first layer of icing and out of your top layer of frosting.
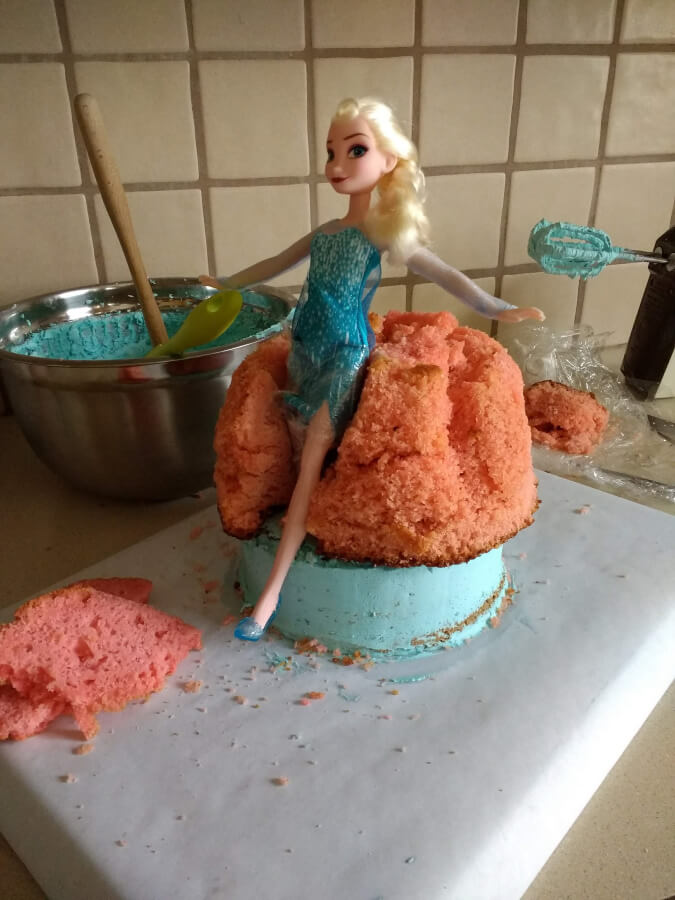
Another trick for your crumb layer is to pipe a gob of frosting all over the cake and then ice the cake all over with a knife while keeping the layer thick. Then, go back and scrape off almost all of it with a knife or long spatula. It will be easy to scrape the icing off all the way down where you may even see some cake. That’s what you want. This layer will end up being thin but you start off with a lot of frosting. Does that make sense?? Again, this helps to keep the crumbs contained and it’s referred to as your crumb layer.
Examples for long spatulas are like these icing spatulas specifically for icing. Or this blender spatula is very similar to something I found at Walmart one time. I find other handy uses for it around the kitchen.
Adding The Elsa Doll Cake
I iced a crumb layer on the bottom cake and waited to ice the dome cake until I had it and the Elsa doll situated. For the cake “plate”, I turned a large baking sheet up-side down and covered it with freezer paper. You can also use parchment paper. The icing will create something like oil spots, as you can see in the pictures, after several hours. It doesn’t hurt anything. If you don’t like that, try adding a doily underneath.
The hole in the middle of the dome from the glass cup was perfect for fitting the Elsa doll right inside. I pre-cut a wedge for the leg to stick out. The cake did crack apart some while I was sticking her down, but the icing will smooth everything out in the end and hold it all together.
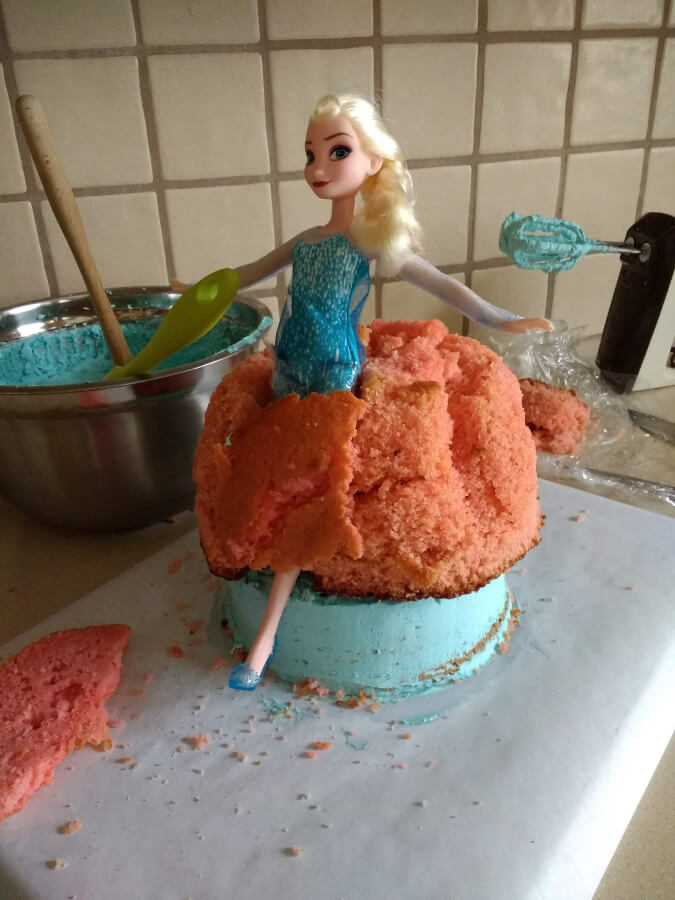
As you can see, I just plopped a piece of cake back over the doll. Icing acts as glue, bonding the cake back together.
Icing The Frozen Cake
I don’t have any in-between photos while icing, unfortunately. But I can tell you what I used.
I mostly used the 2D icing tip. 1M will give you basically the same result. Get a piping bag to use with the tips or you can put all of the icing in a large ziplock bag and cut a small piece off from one corner.
To get swirls with this tip, start in the middle and then apply pressure as you slowly move around and out. Then finally draw the tail out like a snow flurry. See the image here. The black line is the shape you draw with your hand.

Here is a youtube video for an example of piping an icing swirl.
Related Article: Unicorn Pull Apart Cupcake Cake
I did use a smaller icing tip for filling in spaces and anywhere else I wanted to add more detail with small stars. Wilton tip 21 or 14, 16, or 17 give you small stars.
Icing Color and Application
The color I used, and which was a perfect color for a Frozen cake, is Wilton’s Sky Blue.
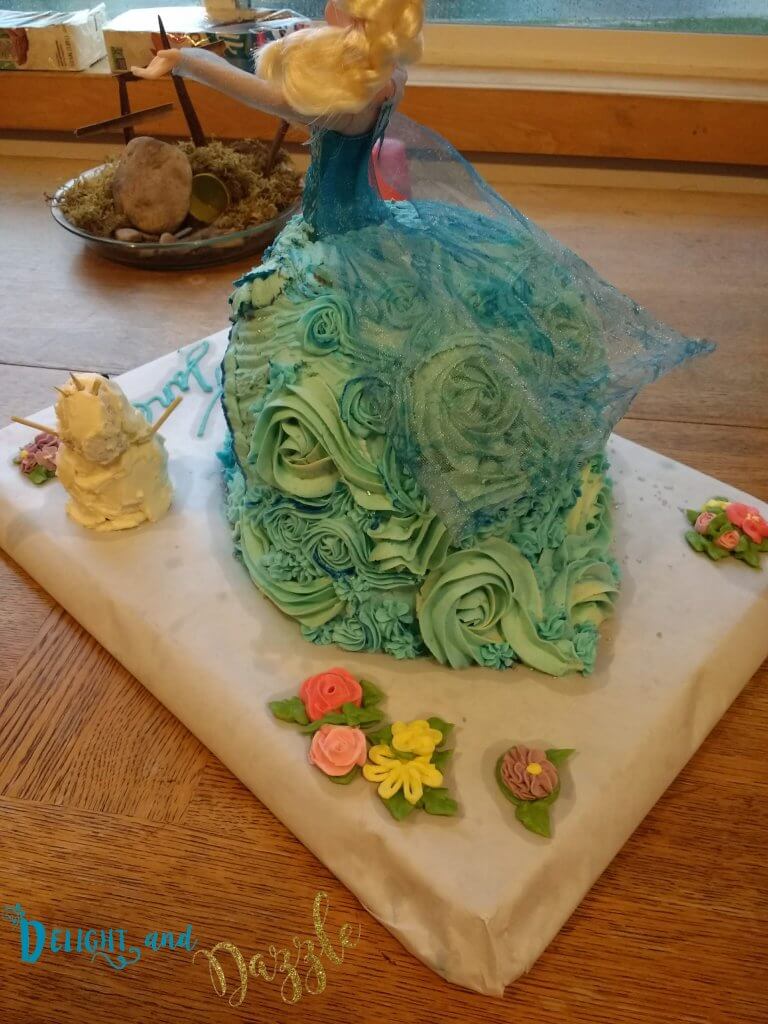
If you noticed, my icing is all blue but it isn’t all the same shade of blue. What I did was take out some icing before mixing in the blue gel color. After I iced the dome cake all over, I partially mixed some white back into the blue. And with the small stars I added more blue gel coloring. This gives me a dynamic color of shades and variations of the blue.
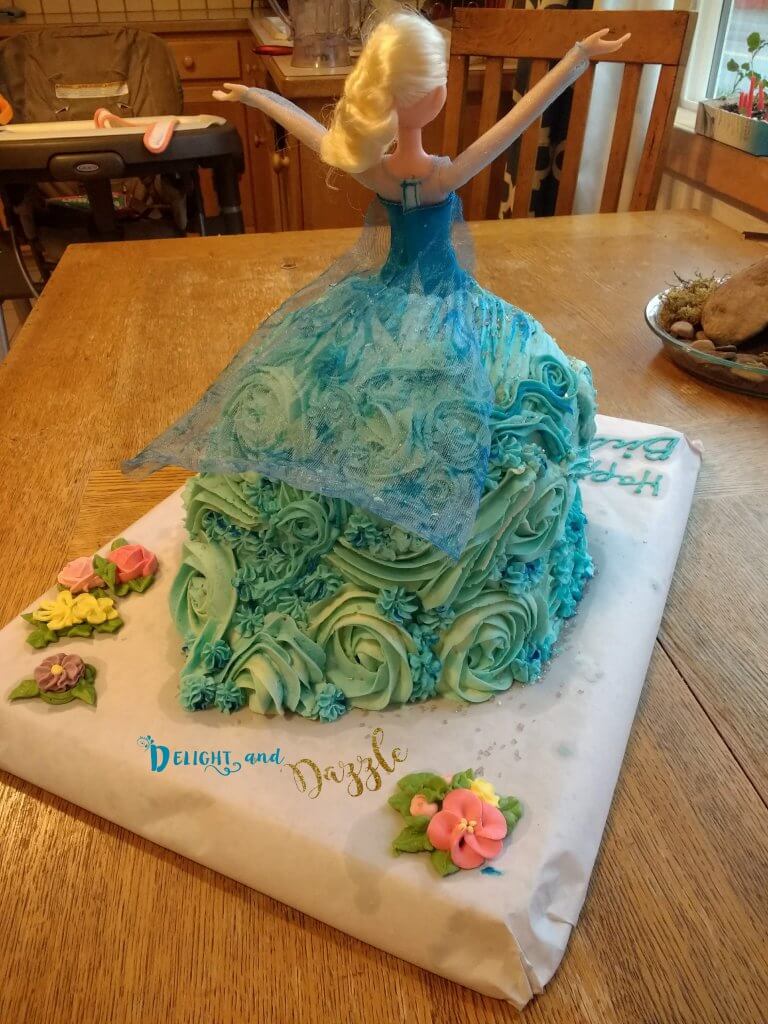
I also tapered the snow in the back. Instead of the back side of the cake being perfectly round, I piped icing to a point onto the cake plate. At the top of the cake, behind the Elsa doll, I started with a few, smaller snow flurries and more spacing between. As I got down the side of the cake I added bigger flurries along with more little stars.
Elsa’s shoe wouldn’t touch the cake plate so I added snow flurries underneath her foot with a few touches of the piping bag.
Ruffles For Elsa Doll Cake Dress
You don’t need to include ruffles on the skirt, as I did here. I just wanted to add something extra to my Frozen cake dress. It did soften the spot right where her leg randomly stick out of plain cake.
If you want to try and add ruffles, use tip 104 or something similar. Place the large end of the tip opening next to the cake and squeeze on your icing bag while you slowly move in the direction that you want the ruffles to go. You can move your hand up and down in tiny motions for added ruffling. I would practice on your counter or parchment paper if you are comfortable with icing this way.
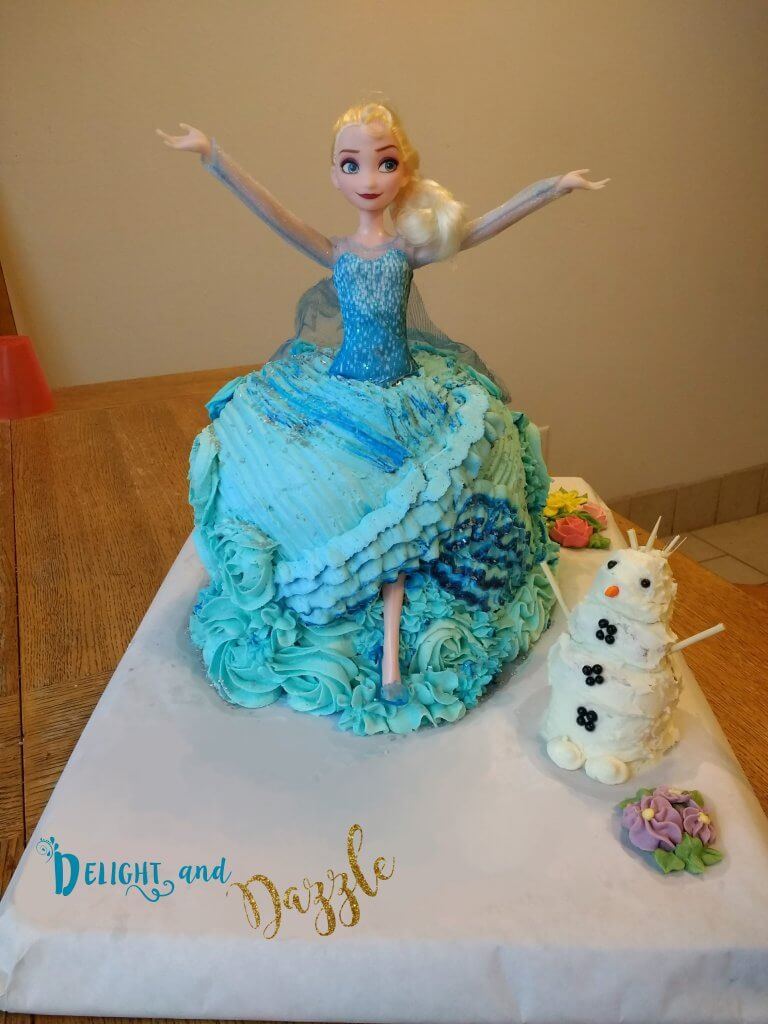
I got the dark blue on the ruffle edges by smearing straight icing gel color in a single line on the side of the icing bag before stuffing icing into the bag.
Here is a youtube video example for icing ruffles.
I also used some icing combs like this to lightly scrape across the Elsa doll cake dress instead of leaving it smooth. This can be substituted with whatever you have on hand to draw a design in the icing, such as a toothpick. Or, keep those spaces smooth. Try starting with this step before decorating anywhere else.
List Of Items Used To Frost My Frozen Cake
- Reusable Piping Bags or Disposable Piping Bags
- This Set of Icing Tips includes all tips you’ll need including the bigger 2D that I mentioned. You can also buy them separately.
- Wilton’s Sky Blue Gel Food/Icing Coloring
- Parchment paper
Snow Man
My daughter wanted to add a snowman. It looks a little messy but I let my two little kids have fun helping me put it together. It doesn’t resemble Olaf in the least but my kids loved it! It’s made from two small donuts that were iced over with a knife.
Frozen Cake Was A HUGE Hit
This Elsa doll cake was a huge hit. People loved it, particularly the Birthday Girl! It’s a fun and unique cake to have the cake become part of the doll. And the snow all around makes it extra fun and detailed. Icing the cake was simple, easy, and fun.

Marina
Thank for the instructions for the Elsa Doll cake. I love the way you give lots of details – instead of YouTube which is sometimes hard to follow!!