
Steps And Pictures For This Painted Hutch Makeover
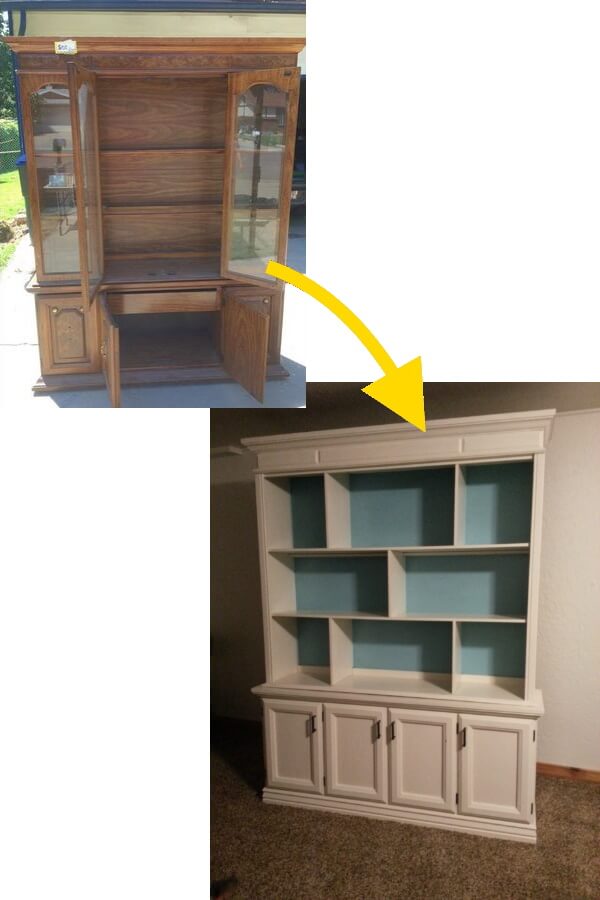
This makeover painted hutch was a great find. It didn’t sell at a garage sale and had been listed online (at a site similar to Craig’s List). So I was able to negotiate the price even lower. If I remember correctly, I paid $60 for the whole thing. It had a good bit of work to do.
The hutch had glass shelves and glass doors. There were lights inside at the top that you could plug in and turn on and off. Handles for opening the bottom doors were in the middle of the door front, which made it awkward to open. Large, outdated motifs (if you can call it decorative) covered the doors. There were also gold knobs on the doors. One of the worst features about this hutch was the chunky bottom trim, which was lifted a couple of inches off the floor. The laminate finish on the hutch was dark and well, laminate!
How I “Undressed” The Hutch
The doors came off and the shelves came out fairly easy. I removed the magnet strips from where the hutch doors closed. However there were grooves left in the inside of the hutch. I filled it with wood filler. There were two narrow pieces of wood that remained on the inside of the back of the hutch where the old shelves rested on. I left those. I also removed the drawer that pulled out from the middle of the cabinets.
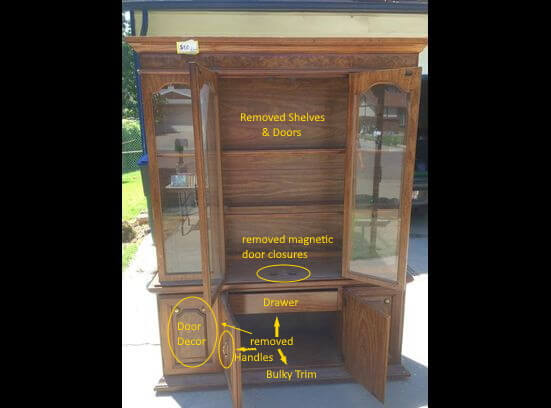
The gold knobs were removed from the door fronts as well as the old ugly handles. Those large motifs on the doors were pried off. They had been glued onto the doors really well so we had to scrape off MDF where it remained and then sand it down. I use some wood filler where part of the drawer came off. The wood filler worked great even though it technically wasn’t a hole. And wood filler to fill the old hardware holes too.
I thought about making new door fronts altogether. Shaker cabinets are really in style and would be easy to build since there are no angle cuts, but my husband convinced me that it would be better to go the former route of removing the motifs. In the end I’m glad we did that instead.
We also removed the bottom trim. Some of this was a little tricky. We had to do a combination of unscrewing weird bolts and prying.
Re-Building The Hutch Into A Bookcase
At Home Depot I bought inexpensive wood and cut shelves for inside the hutch. I lined up the new shelves to where they rested nicely on top of the old shelving pieces (mentioned earlier). The pieces of wood that were added vertically had to be notched to fit around them.
These new shelves were glued and nailed into place. I used finishing nails were they would show through on the outside. After painting you can’t see the finishing nails.
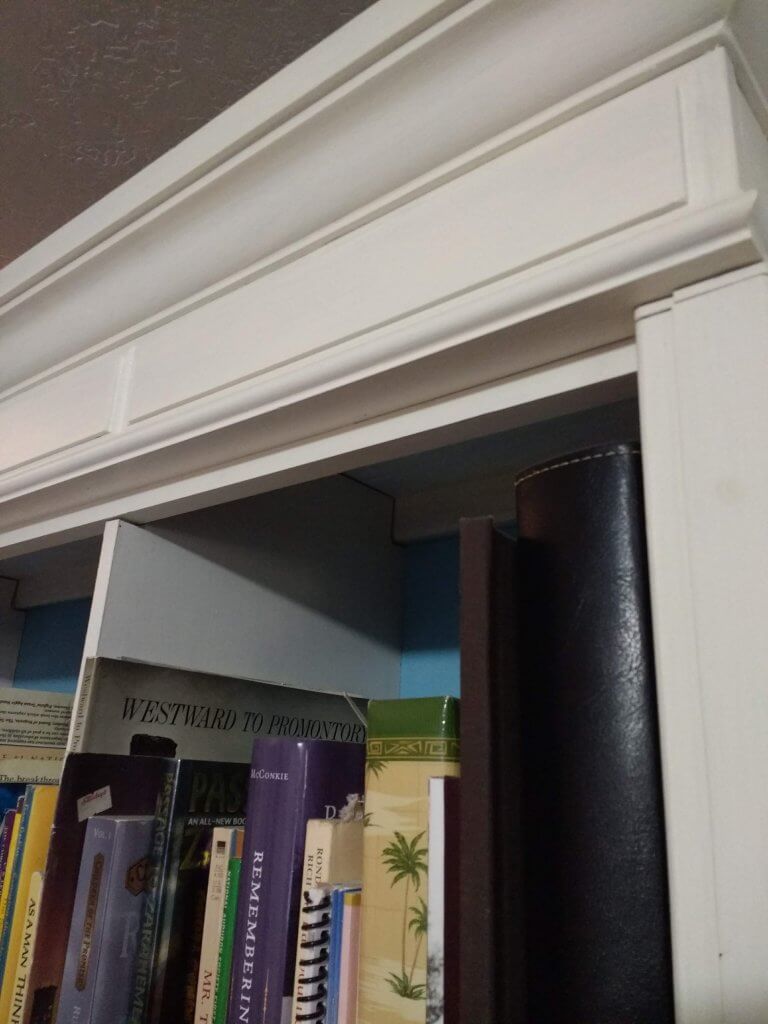
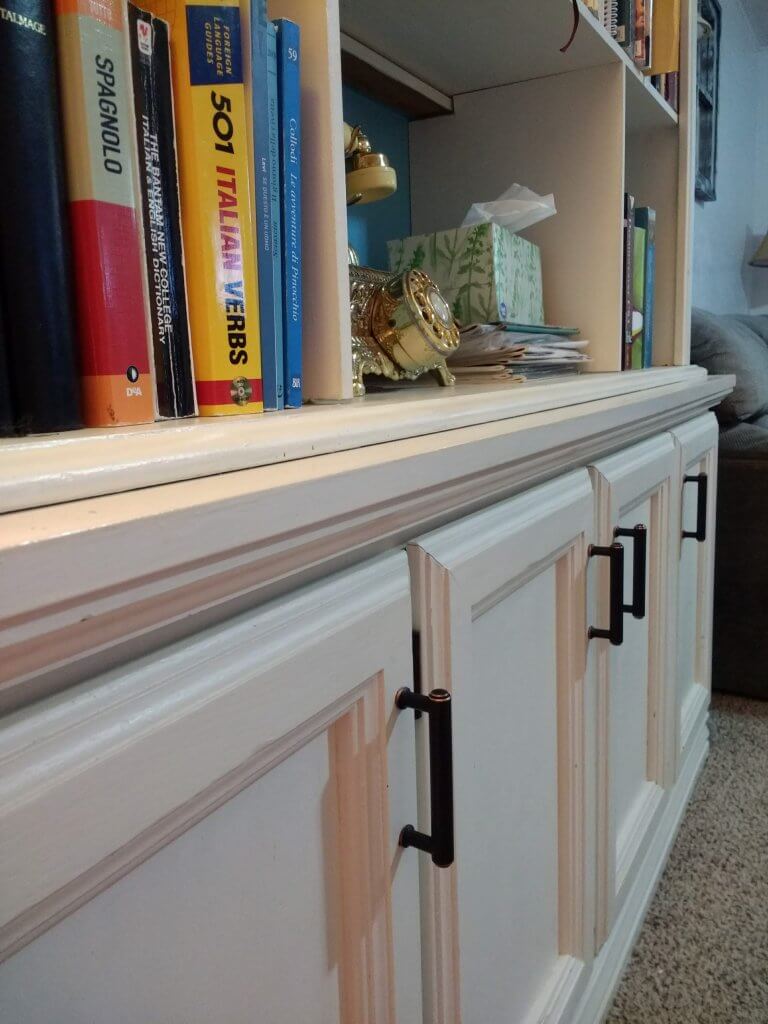
I also bought new trim from Home Depot (super cheap to buy) to replace the ugly trim on the bottom. These were cut with a mitre saw to fit together at the corners.
Home Depot has a circular saw for straight cuts in the back. Customers are welcome to use it (or ask for help if you don’t want to cut it yourself) if you don’t have a saw at home. They don’t have a mitre saw, which is great for cutting angles when you want to put corners together. You can cut angled cuts with a circular saw but its tough to do.
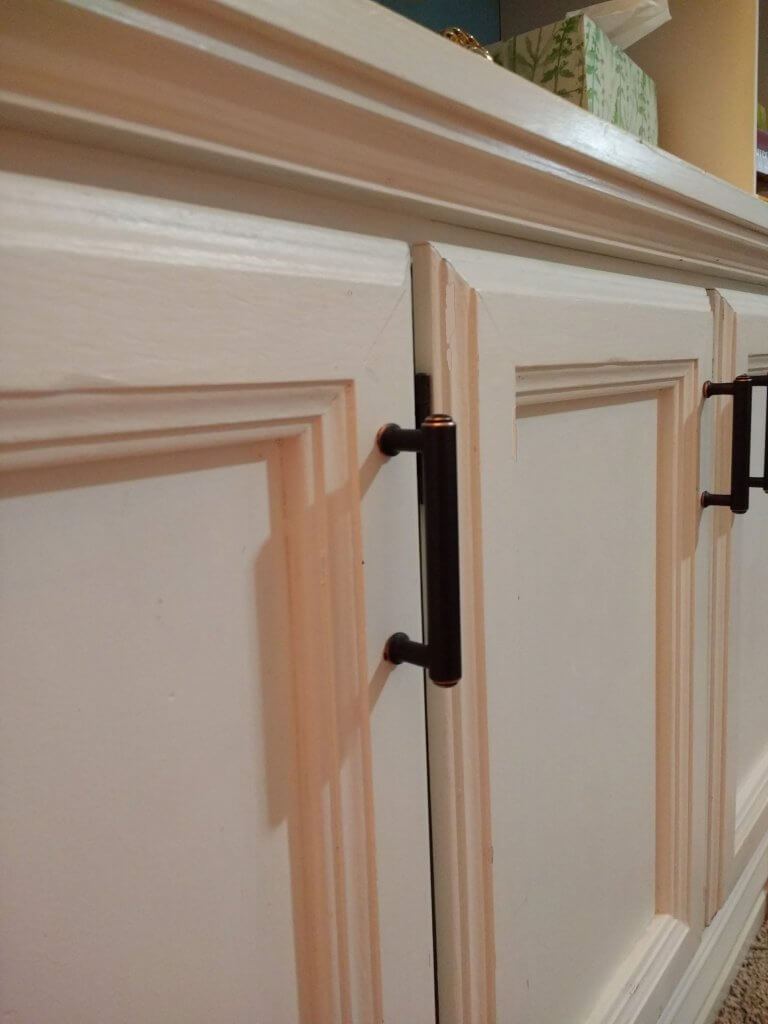
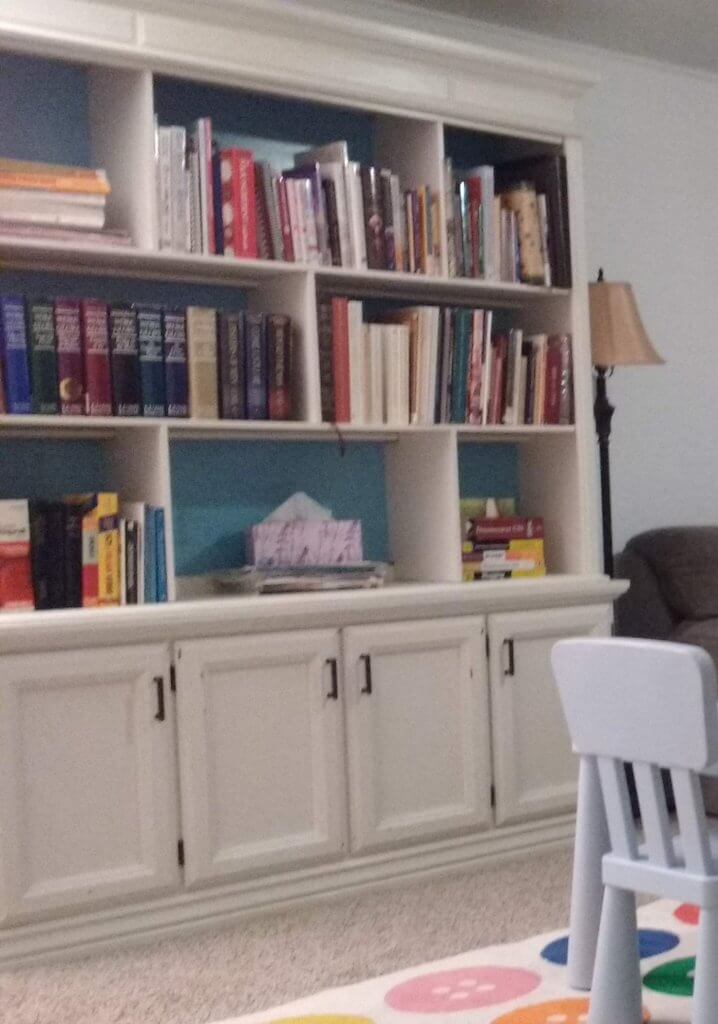
Hardware was also purchased at Home Depot. I drilled new holes for the hardware to go on the top corners of the doors. Paint samples also came from Home Depot’s paint area. The paint samples were used to mix with a chalk paint recipe. I painted three coats of white on the laminate furniture with blue on the back inside.
Related Article: Guide For Painting Laminate Furniture
Summing Up The Painted Hutch Project
There were a few tricky parts to putting this painted hutch together but overall it was simple and rewarding in the end. I love it when I can do a few things more than just paint to give new life to an old piece of furniture. Especially when it was deemed as junk before. It takes a bit of effort but that’s the creating part that brings fulfillment. Plus, you can get nice furniture far cheaper than any other way.
A painted hutch was exactly what I needed for this particular place in my home because I wanted something tall and I wanted a bookcase plus a hideaway spot for kids’ toys. I now store my kids’ toys in the bottom cabinets.
Related Article: Giving Character To An Ordinary Dresser
Leave a Reply